Word docs in Dropbox or SharePoint? Convert them to PDF/A in Power Automate—five steps to archival.
Reports, contracts, and proposals often live as Word files in Dropbox, SharePoint, or OneDrive. When you need them archived for compliance, audits, or long-term preservation, a raw .docx isn't enough. PDF/A (ISO 19005) is the standard for digital archiving: fonts embedded, no external links, readable for decades. You can't go straight from Word to PDF/A—you must convert to PDF first. In Power Automate, build a flow: get a Word (or Excel, PowerPoint) file from cloud storage, convert it to PDF, compress it, turn that into PDF/A, and save the archival file. Five steps. One flow. No manual export.
In a nutshell: Get file content using path (e.g. /blog data/pdfa/Word Sample.docx) → PDF – Convert to PDF → PDF – Compress → PDF – Create PdfA (e.g. PdfA1b) → Create file to /blog data/pdfa/output. Output: archival PDF/A ready for long-term preservation.
Why Convert First, Then Compress, Then Archive?
PDF/A only accepts PDFs. If your source is Word, Excel, PowerPoint, or an image, you must convert to PDF before applying PDF/A. The Convert to PDF action handles DOC, DOCX, PPT, PPTX, XLS, XLSX, TXT, EML, and common image formats. Compress PDF shrinks the file before archiving—smaller files transfer and store faster. Create PDF/A embeds fonts, removes external dependencies, and locks the document for long-term preservation. One flow does all three—convert, compress, archive.
Complete flow overview
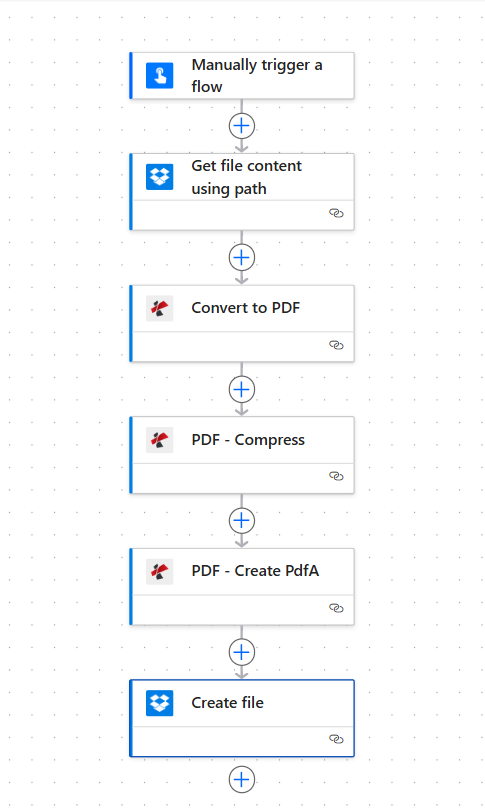
Five steps in sequence: Get file content → Convert to PDF → Compress PDF → Create PdfA → Create file. Each action shows a green checkmark when configured.
What You'll Get
Input: A Word document (e.g. Word Sample.docx) or other supported format at a Dropbox or SharePoint path. Output: An archival PDF/A file in your output folder—ready for compliance, audits, or long-term archives.
What You Need
- Power Automate — Open Power Automate. Create a new cloud flow (Instant or Automated).
- PDF4me API key — Get your API key. Connect it when you add PDF4me actions. First time? See Connect PDF4me to Power Automate.
- Dropbox or SharePoint — For getting file content and creating the output file. Use the connector that matches your storage.
The Flow: 5 Steps
- Get file content using path (Dropbox / SharePoint) — Fetches the source document from a path.
- PDF – Convert to PDF (PDF4me) — Converts Word, Excel, PowerPoint, or images to PDF.
- PDF – Compress (PDF4me) — Shrinks the PDF before archiving.
- PDF – Create PdfA (PDF4me) — Converts the PDF to an archival-compliant format.
- Create file (Dropbox / SharePoint) — Saves the PDF/A to your output folder.
Step 1: Get File Content
Flow so far: Trigger → Get file content.
- Add Manually trigger a flow (or When a file is created in Dropbox/SharePoint for automation).
- Add Dropbox (or SharePoint) → Get file content using path.
- **File Path *** — Enter the path to your document, e.g.
/blog data/pdfa/Word Sample.docx. - Infer Content Type — Yes (under Advanced).
- Ensure the connection is set.
Get file content using path: Configuration
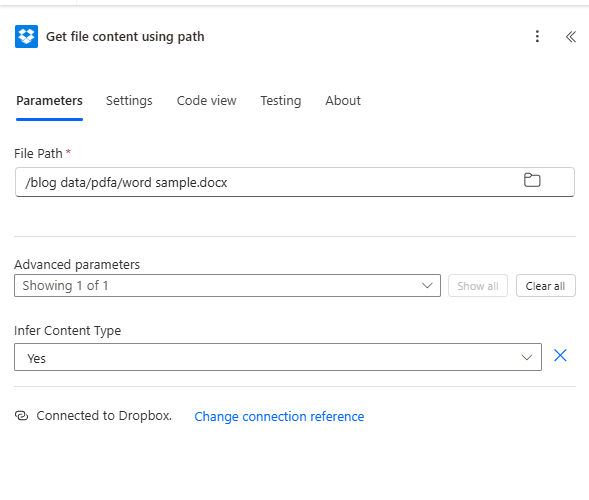
Get file content: File Path set to the Word document path. Map File Content (binary) from this step into the next actions—not the path.
Map File Content, not path: All PDF4me actions need the binary File Content from the previous step. Use the output that contains the actual file bytes.
Step 2: Convert to PDF
Flow so far: Get file content → Convert to PDF.
- Add PDF4me → PDF – Convert to PDF.
- **File Content *** — Map File Content from Get file content.
- **File Name *** — e.g.
Word Sample.docx(must include extension so PDF4me detects the format). - Ensure Connected to PDF4me PDF.
PDF – Convert to PDF: File mapping
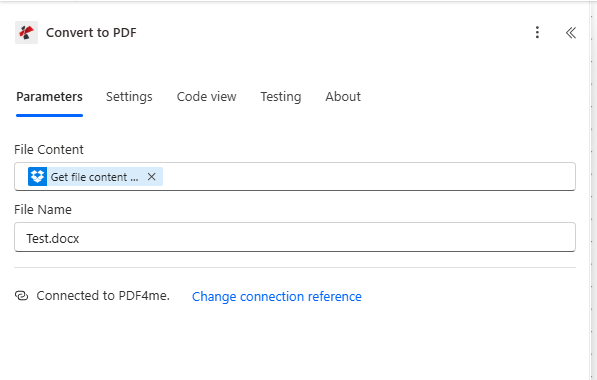
Convert to PDF: File Content from Get file content, File Name with .docx extension. PDF4me auto-detects format from the extension.
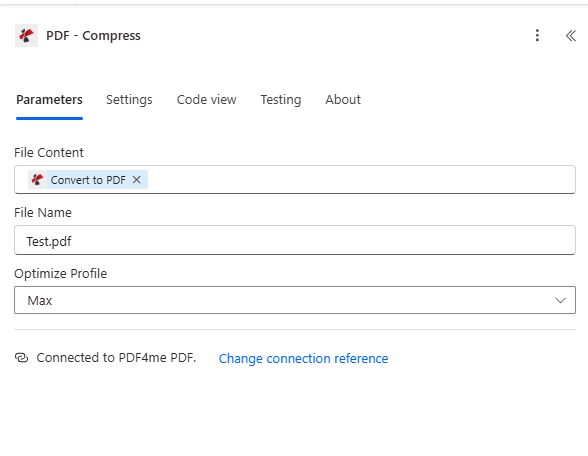
Step 3: Compress PDF
Flow so far: Get file content → Convert to PDF → Compress PDF.
- Add PDF4me → PDF – Compress.
- **File Content *** — Map File Content from Convert to PDF.
- **File Name *** — e.g.
Converted.pdf. - Optimize Profile — Default, Maximum Compression, For Web, or For Print as needed.
- Ensure Connected to PDF4me PDF.
PDF – Compress: Reduce file size before archiving
Compress PDF: File Content from Convert to PDF, File Name, Optimize Profile. Smaller files archive and transfer faster.
Step 4: Create PDF/A
Flow so far: Get file content → Convert to PDF → Compress PDF → Create PdfA.
- Add PDF4me → PDF – Create PdfA.
- **File Content *** — Map File Content from Compress PDF (or from Convert to PDF if you skipped compression).
- **File Name *** — e.g.
Compressed.pdf. - **Compliance *** — Choose a level (e.g. PdfA1b for basic archival).
- Allow Downgrade / Allow Upgrade — Set as needed for your compliance policy.
- Ensure Connected to PDF4me PDF.
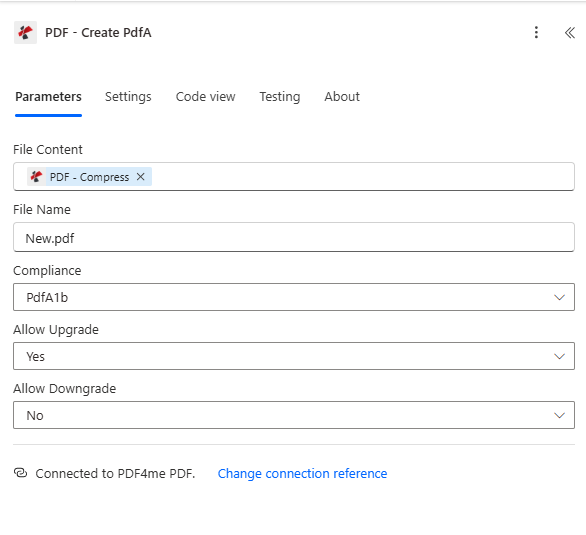
PDF – Create PdfA: Archival configuration
Create PdfA: File Content from Compress PDF, File Name, Compliance (e.g. PdfA1b), Allow Downgrade and Allow Upgrade options.
PDF/A compliance options
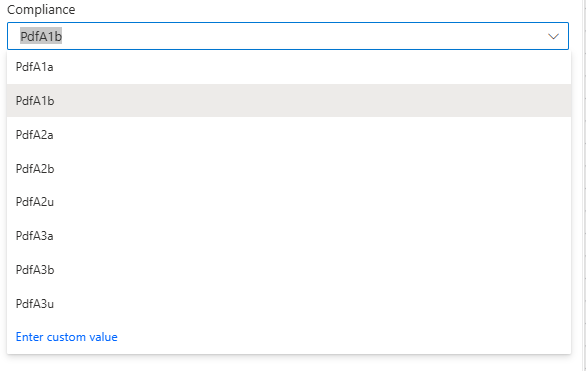
PdfA1b — basic visual integrity. PdfA1a — accessible with document structure. PdfA2 — newer standard with improved compression. PdfA3 — allows embedding other files (e.g. XML, Excel).
Step 5: Create File (Save PDF/A)
Flow so far: Get file content → Convert to PDF → Compress PDF → Create PdfA → Create file.
- Add Dropbox (or SharePoint) → Create file.
- **Folder Path *** — e.g.
/blog data/pdfa/output. - **File Name *** — e.g.
Output.pdf. - **File Content *** — Map File Content from the PDF – Create PdfA step.
- Ensure the connection is set.
Create file: Save archival PDF/A to output folder
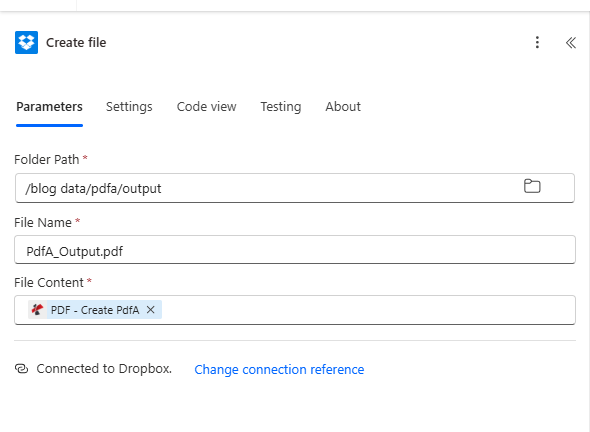
Create file: Folder Path, File Name, File Content mapped from Create PdfA. The archival PDF/A is saved to your chosen folder.
Who Uses "Convert Then Archive"? Real-World Examples
Government and public records: Word-based forms, permits, and filings need long-term retention. Convert to PDF/A in Power Automate and store in SharePoint or Dropbox for compliance.
Healthcare and pharma: Policies, consent forms, and trial documentation in Word require archival for regulatory audits. PDF/A ensures readability for decades.
Legal and contracts: Agreements and amendments often start as Word. Convert, compress, then archive to PDF/A for legal hold and e-discovery.
Quick Reference: Key Settings
| Step | Setting | Example |
|---|---|---|
| 1. Get file content | File Path | /blog data/pdfa/Word Sample.docx |
| 2. Convert to PDF | File Name | Word Sample.docx (with extension) |
| 3. Compress PDF | File Content | From Convert to PDF |
| 4. Create PdfA | Compliance | PdfA1b (or 2b, 3b as needed) |
| 5. Create file | File Content | From Create PdfA |
For full parameter details, see Convert to PDF — Power Automate and Create PDF/A — Power Automate.
Troubleshooting
Ensure File Name in Convert to PDF includes the correct extension (e.g. .docx). PDF4me uses it to detect the input format.
In Create file, map File Content from the PDF – Create PdfA action—that's the actual PDF/A binary.
PDF4me Troubleshooting covers 401 (API key), 402 (credits), and more.
What's Next?
- Replace the manual trigger with When a file is created in Dropbox or SharePoint to process every new Word file automatically.
- Use dynamic file paths and names from the trigger so each document keeps a clear output name.
- Already have PDFs? Use the Compress then Create PDF/A flow—no conversion step needed.