Parseを使用したAIドキュメントパーサー
このガイドの内容
AIドキュメントパーサー。解析 JSON に変換するダッシュボード設定は ドキュメントスキーマ の中へ AIを活用した構造化PDF抽出. 作成します アナライザ選ぶ 解析 タイプ、そして必要なフィールドの説明 フィールド名、 フィールドタイプ、 そして フィールドの説明AI は文書を意味的に読み取るため、描画されたキャプチャ領域や正規表現は必要ありません。保存後、同じアナライザー ID が実行されます。 REST API、 Make、 Zapier、 Power Automate、 そして n8n。
セットアップの認証
AIドキュメントパーサーアナライザーは、 PDF4me 開発者ダッシュボード。アカウントでサインインしてから、 API AIパーサーのキー API ここで構築したアナライザーを参照する呼び出し。
- アナライザーリスト(ステップ 1–2):
https://dev.pdf4me.com/dashboard/#/ai-document-parser/ - 分析装置の詳細(ステップ 3–5):
https://dev.pdf4me.com/ai-document-parser/?id=<analyzer-guid>
見逃してはならない重要な事実
フィールドの説明 ドキュメント内の各値を検索するための文字列を指定します。具体的に指定し、別名(「販売注文番号、SO No.と表記される場合もあります」など)も含めてください。曖昧な説明は抽出精度を低下させます。購入注文解析器) は、すべての API 呼び出しと自動化モジュールの使用例。事前に明確な命名規則を決定してください。後から変更すると、そのモジュールを参照するすべてのワークフローを再配線する必要が生じます。ステップ1:ダッシュボードでAIドキュメントパーサーを開きます
- サインインはこちら pdf4me.com。
- ダッシュボードのサイドバーから、クリックします AIドキュメントパーサー。
- リストページには、既存のアナライザーがすべて3つの列で表示されます。 アナライザーID、 分析装置の種類 (解析または分類) 行動。
- 青色をクリック +追加 新しいアナライザーを開始するには、このボタンをクリックしてください。
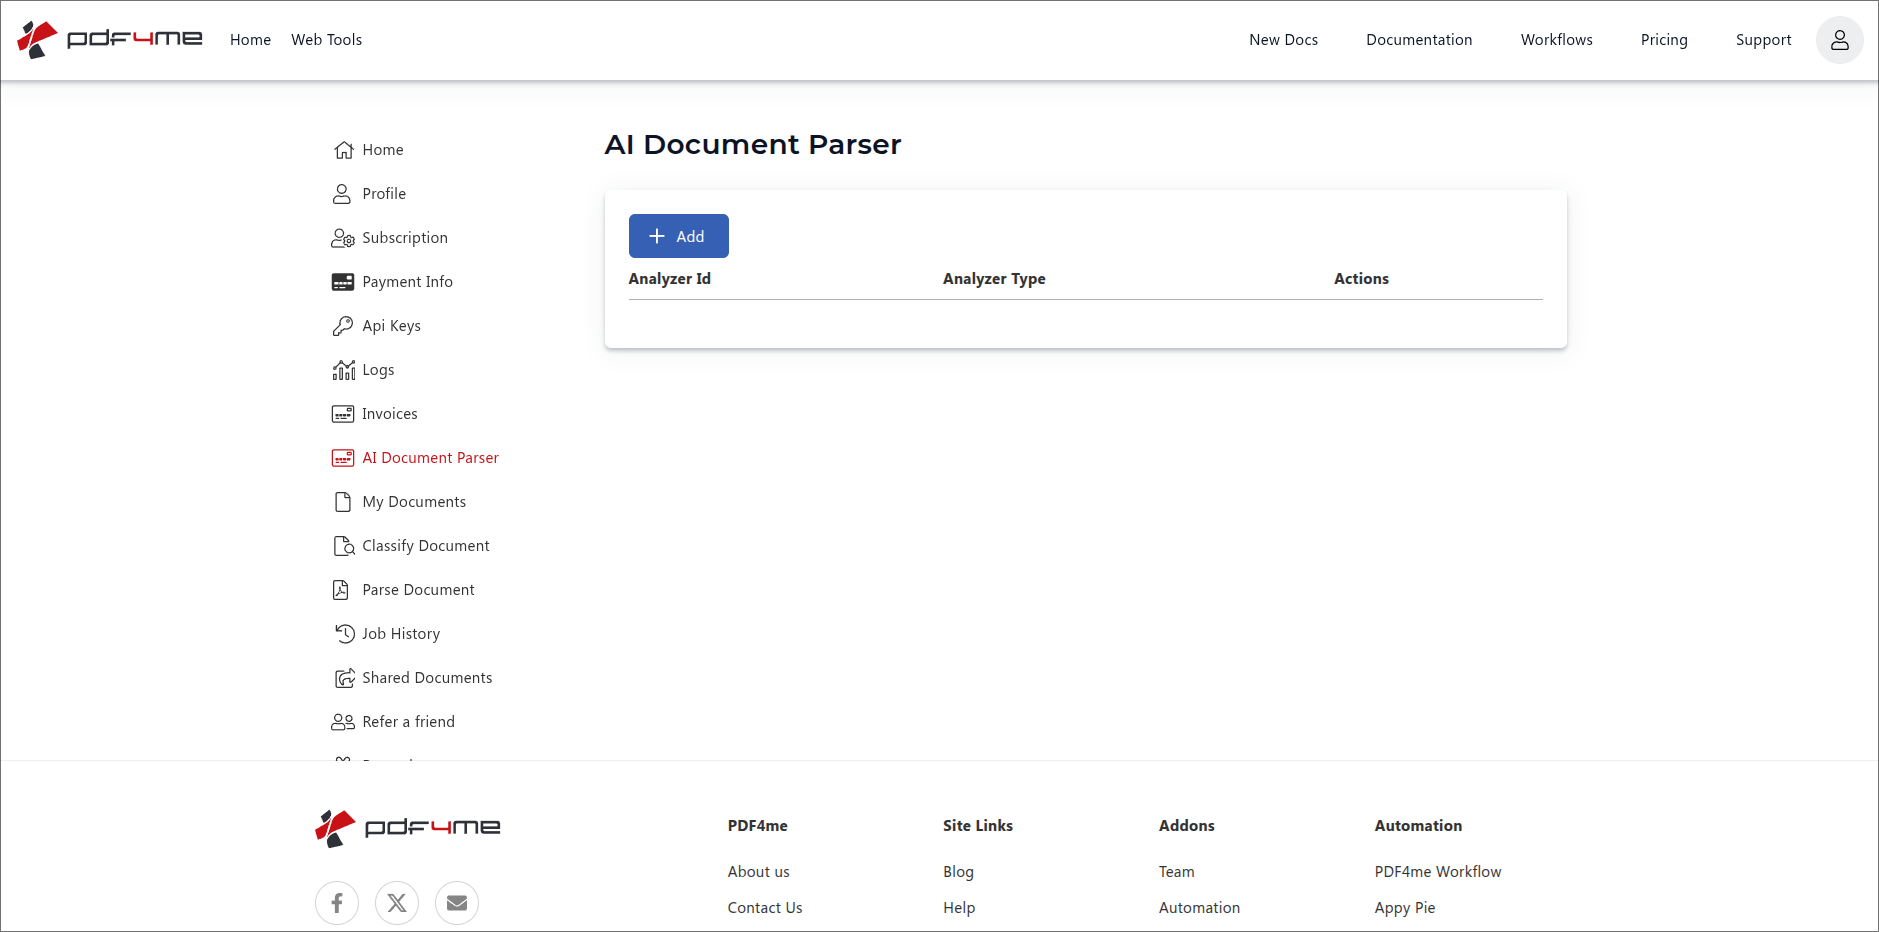
AIドキュメントパーサーのリストビューです。[+追加]をクリックして新しいアナライザーを作成します。
ステップ2:アナライザータイプ「解析」を選択し、名前を付けます。
新しい行が表示され、3つのコントロールが表示されます。
- アナライザーID入力覚えておけるような明確な識別子を入力してください。例:
purchase order parser、Invoice Parser v1、 またはvendor_statement_parser命名形式に制限はありません。スネークケース、キャメルケース、ケバブケース、スペースを含む通常の単語など、すべて同じように機能します。 - アナライザータイプのドロップダウン。 選ぶ 解析 (このガイド)または 分類する (参照) 分類ガイド)
- 保存/キャンセル ボタン。保存するとアナライザーが作成され、キャンセルすると行が破棄されます。
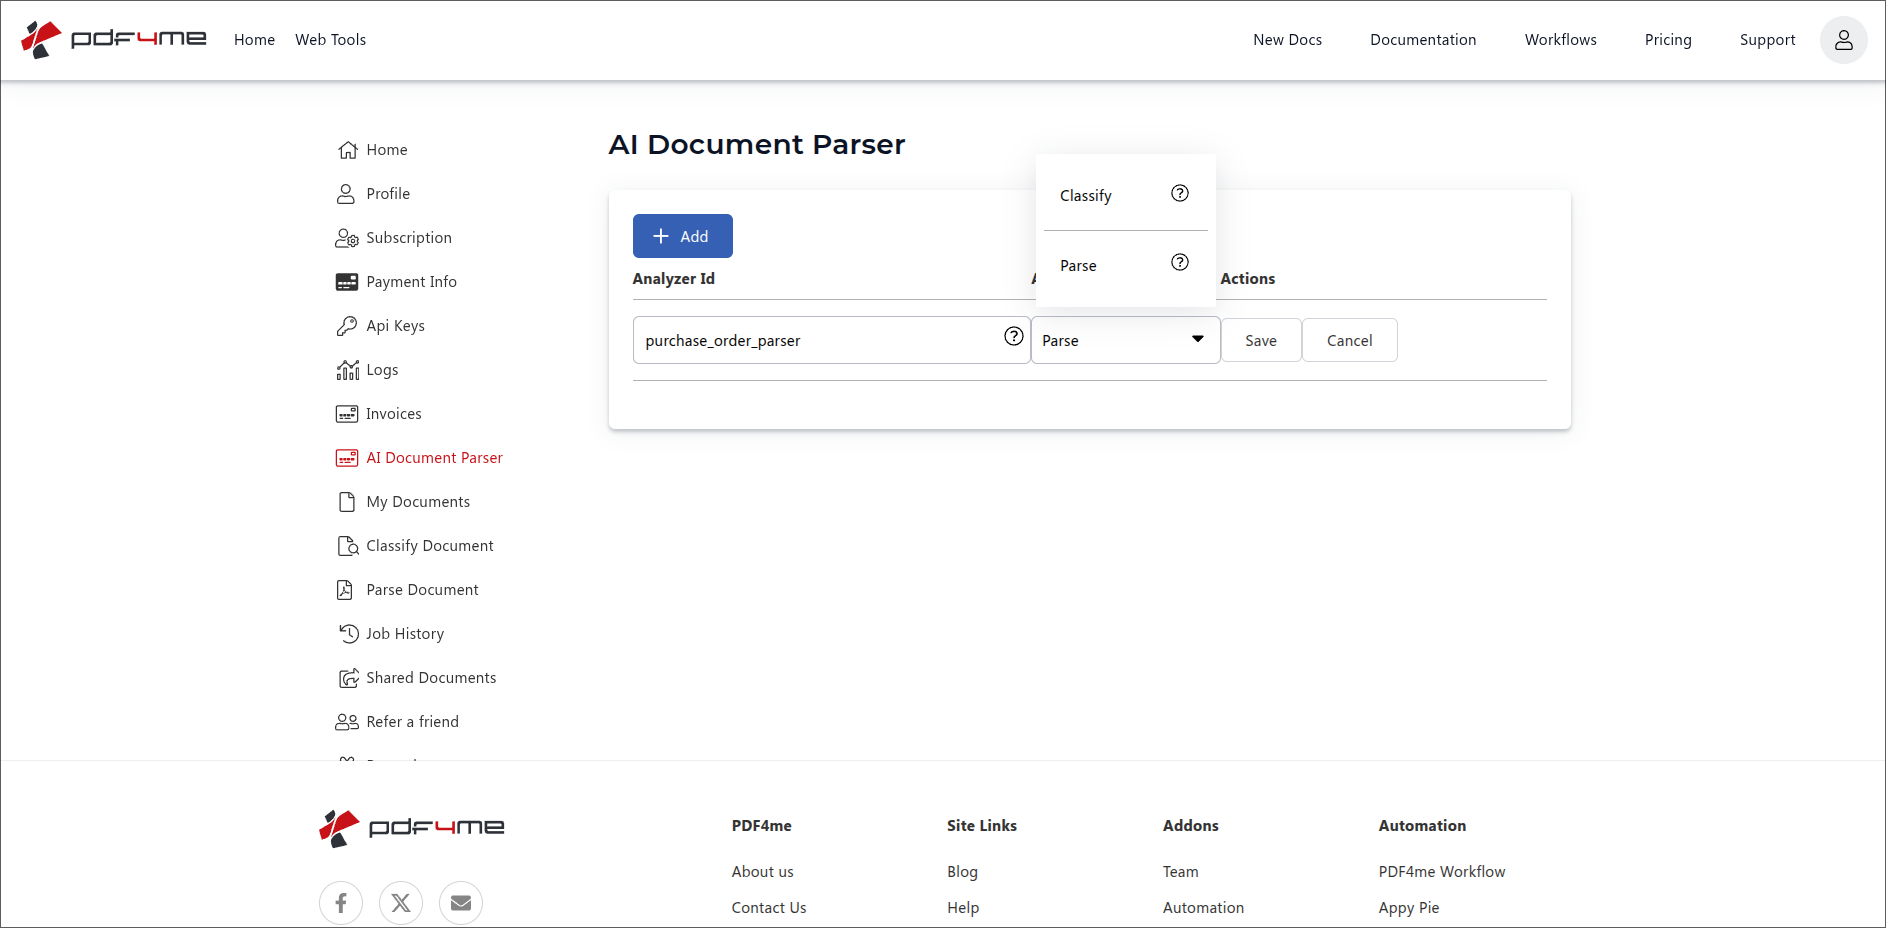
行を追加するには、アナライザーIDを入力し、「解析」を選択してから「保存」をクリックします。
命名のヒント: 名前に文書ファミリーを含める(請求書解析ツール、 購入注文解析器、 出荷伝票解析ツール) アナライザー ID は、下流の自動化処理で呼び出されるものです。新しいプラットフォームに接続するたびに、明確な名前が役立ちます。大文字小文字や区切り文字のスタイルは問いません。
ステップ3:アナライザーを開き、スキーマを追加します。
新しい行をクリックすると詳細ページが開きます。URLパターンは次のとおりです。
https://dev.pdf4me.com/ai-document-parser/?id=<your-analyzer-guid>
ダッシュボードは、初回起動時にアナライザーごとにGUIDを発行します。次回以降、同じアナライザーに直接アクセスできるよう、このURLをブックマークしておいてください。
詳細ページには以下が表示されます。
- 解析情報 (左)ステップ2で入力したアナライザーIDが表示されます。このパネルは読み取り専用です。
- スキーマ (右)。デフォルトでは空です。 + 右上のボタンをクリックしてスキーマを追加します。
- 変更を保存 (左上)。このページで行った編集内容はすべて保持されます。
- 戻る. に戻る アナライザー一覧。
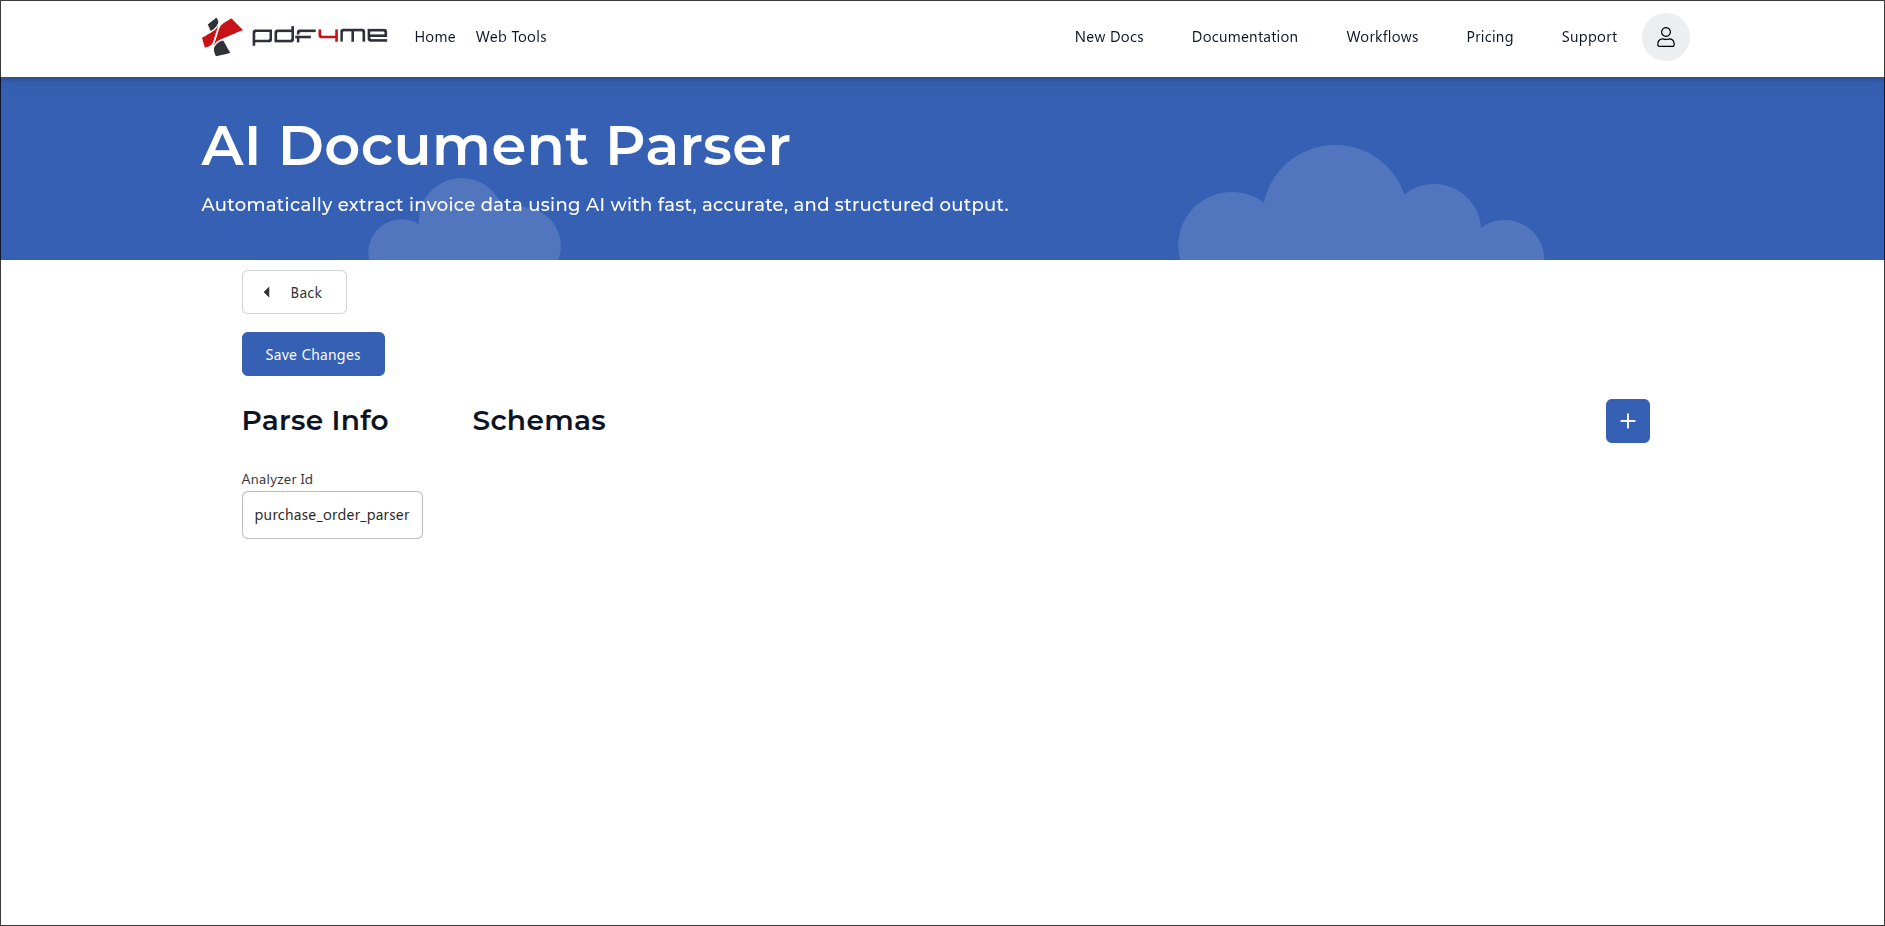
アナライザーの詳細。青色の「+」ボタンをクリックして、ドキュメントスキーマを追加します。
ステップ4:ドキュメントスキーマを定義する JSON
クリックした後 +空のスキーマ カードが開きます。 JSON 2つのトップレベルキーを持つオブジェクト:
descriptionスキーマが抽出した内容を1文で要約したもの。AIはこの要約を全体的なコンテキストとして使用します。fieldsフィールド定義の配列。各フィールドには以下が含まれます。fieldName機械可読名(スペースなし)、 JSON 応答のキー。fieldType。string、number、 またはdate解析と検証を実行します。fieldDescriptionAIがこのフィールドを見つけるために使用する自然言語によるヒント。具体的に記述してください。
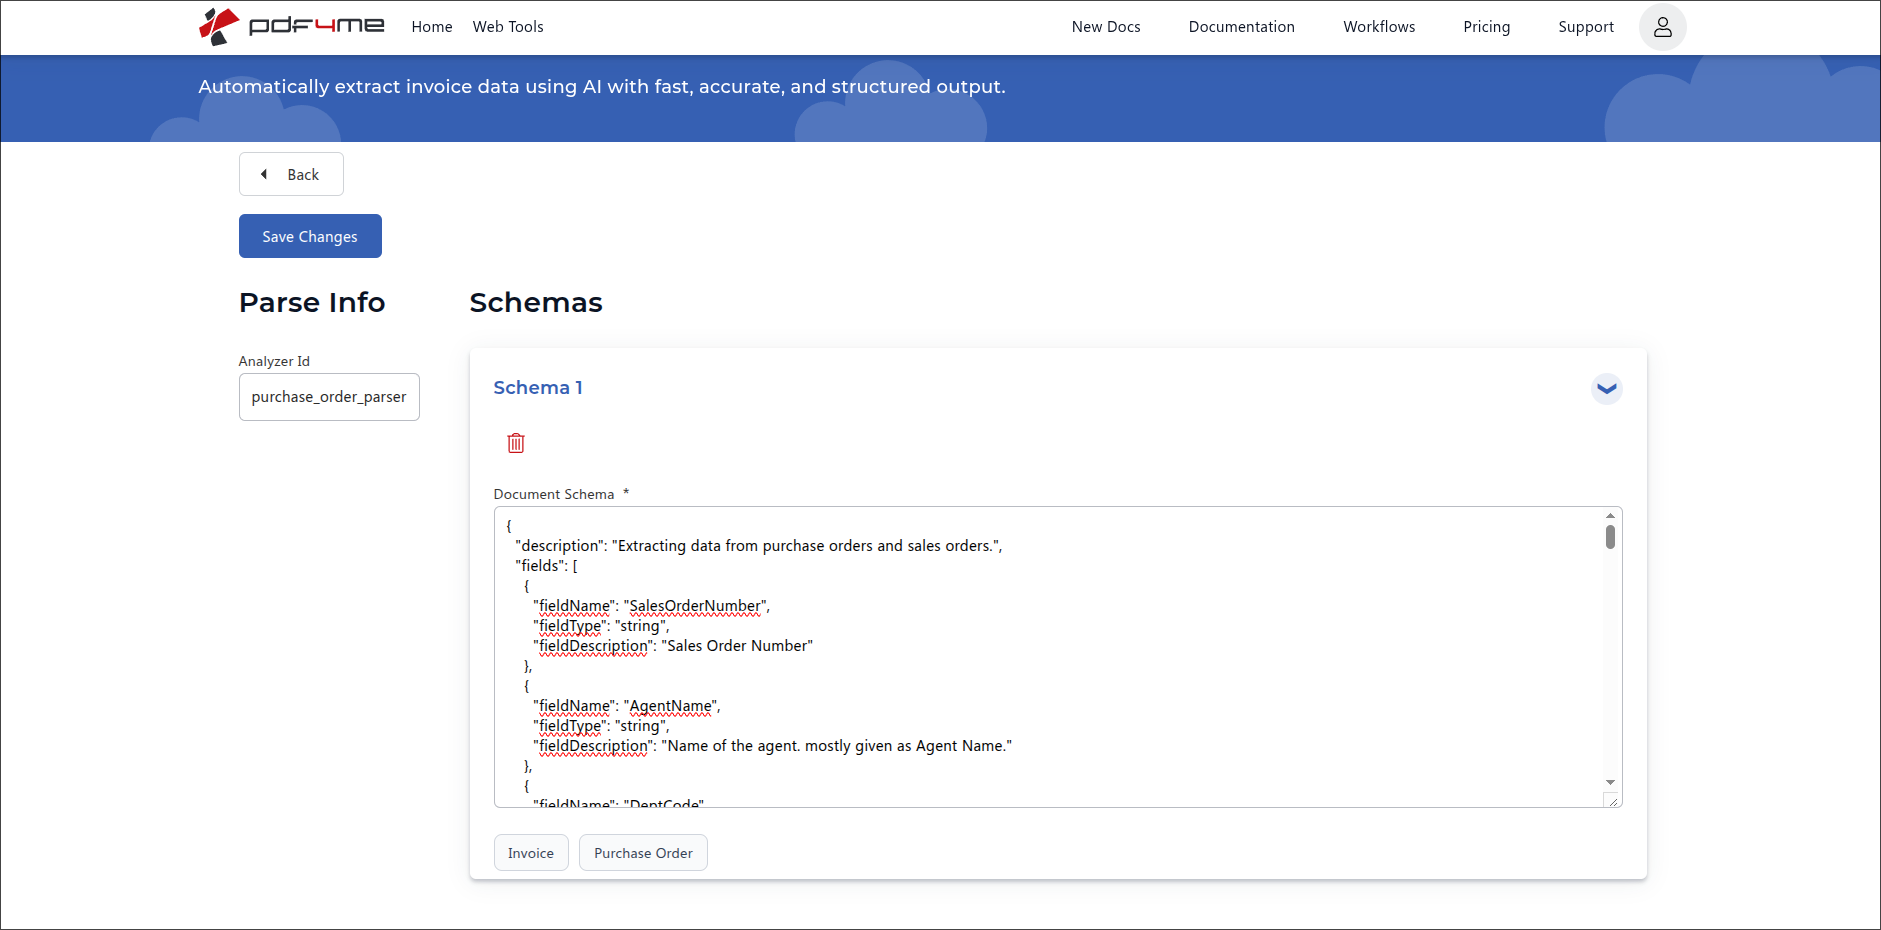
請求書および発注書テンプレート用のクイック入力ボタンを備えた文書スキーマエディタ。
例:発注書スキーマ
{
  "description": "Extracting data from purchase orders and sales orders.",
  "fields": [
    {
      "fieldName": "SalesOrderNumber",
      "fieldType": "string",
      "fieldDescription": "Sales Order Number"
    },
    {
      "fieldName": "AgentName",
      "fieldType": "string",
      "fieldDescription": "Name of the agent, mostly given as Agent Name."
    },
    {
      "fieldName": "DeptCode",
      "fieldType": "string",
      "fieldDescription": "Department or cost-centre code printed on the order."
    },
    {
      "fieldName": "OrderDate",
      "fieldType": "date",
      "fieldDescription": "Date the order was placed. Accept formats like DD/MM/YYYY, MM-DD-YYYY, or written out as 5 June 2026."
    },
    {
      "fieldName": "TotalAmount",
      "fieldType": "number",
      "fieldDescription": "Grand total of the order in the document's currency, after taxes."
    }
  ]
}
例:請求書スキーマ(請求書クイック入力ボタンを使用)
{
  "description": "Extracting data from supplier invoices.",
  "fields": [
    {
      "fieldName": "InvoiceNumber",
      "fieldType": "string",
      "fieldDescription": "Unique invoice identifier, sometimes shown as Invoice No. or INV."
    },
    {
      "fieldName": "InvoiceDate",
      "fieldType": "date",
      "fieldDescription": "Date the invoice was issued."
    },
    {
      "fieldName": "DueDate",
      "fieldType": "date",
      "fieldDescription": "Date payment is due, sometimes shown as Payment Due or Net Due."
    },
    {
      "fieldName": "VendorName",
      "fieldType": "string",
      "fieldDescription": "Company name of the supplier or vendor sending the invoice."
    },
    {
      "fieldName": "TotalAmount",
      "fieldType": "number",
      "fieldDescription": "Grand total in the invoice currency, including taxes."
    }
  ]
}
クイックフィルボタン(請求書、発注書): スキーマカードの一番下にあります。 これらを出発点として活用してください いずれかをクリックすると、その文書ファミリーの標準的なスキーマが読み込まれます。その後、フィールドの名前を変更したり、不要な部分を削除したり、拡張したりして、実際の文書に合わせてください。プリセットはあくまでも骨組みであり、最終的なスキーマではありません。
テーブルフィールド(ネストされた行)を含むスキーマ
使用 フィールドタイプ: "テーブル" 請求書明細や発注書明細などの繰り返し行を抽出する必要がある場合に使用します。各テーブルフィールドには独自のネストされた フィールド 列を記述する配列。
{
  "description": "Invoice data extractor",
  "fields": [
    {
      "fieldName": "invoiceNumber",
      "fieldType": "string",
      "fieldDescription": "Invoice number / bill number / receipt number"
    },
    {
      "fieldName": "invoiceDate",
      "fieldType": "date",
      "fieldDescription": "Look for labels: 'Invoice Date', 'Bill Date', 'Date', 'Dated', 'Issue Date', 'Doc Date'. If 4 digit year not found then consider 2 digit year at the end of extracted date.",
      "fieldMethod": "generate"
    },
    {
      "fieldName": "lineItems",
      "fieldType": "table",
      "fieldDescription": "All product / service rows from the invoice table. Be careful, sometimes a row can be part of the next item like when description goes over one line, but it's of a single item.",
      "fields": [
        {
          "fieldName": "itemNumber",
          "fieldType": "string",
          "fieldDescription": "Product number, product id number or product code"
        },
        {
          "fieldName": "hsnCode",
          "fieldType": "string",
          "fieldDescription": "HSN / SAC code (4 to 8 digit)"
        }
      ]
    }
  ]
}
フィールド属性
| 属性 | 必須? | その機能 |
|---|---|---|
fieldName | Required | The name of the field and how it will appear in the response JSON. |
fieldType | Required | The type of data to extract. One of string, number, date, or table. |
fieldDescription | Required | Natural-language description of what needs to be extracted and where to find it. Include alternate labels and example formats so the AI matches correctly. |
fieldMethod | Optional (default extract) | How the AI fills the value. extract takes the value verbatim from the document. generate tells the AI to derive or normalise it (useful for dates, computed totals, or cleaned-up IDs). Omit for default extract behaviour. |
fields | Required when fieldType is table | Nested array describing the columns of the table. Each entry takes the same attributes as a top-level field (fieldName, fieldType, fieldDescription, fieldMethod). Cannot itself be table. |
フィールドタイプの参照
フィールドタイプ | 最適 | サンプルフィールドの説明 |
|---|---|---|
string | Names, identifiers, codes, free text | Customer name as printed on the invoice header. |
number | Amounts, quantities, tax rates, counts | Grand total of the order in the document currency, including taxes. |
date | Dates, due dates, issue dates, timestamps | Date the invoice was issued, accept DD/MM/YYYY and 5 June 2026 formats. |
table | Repeated rows (line items, addresses, transactions) | All product / service rows from the invoice table. Carries a nested fields array describing the columns. |
ステップ5:変更を保存してアナライザーを使用する
クリック 変更を保存 左上の項目でスキーマを永続化します。これでアナライザーがアクティブになり、アナライザーIDを使用してどのプラットフォームからでも参照できるようになります。
アナライザーを使用する API または自動化呼び出し
一度保存すれば、同じアナライザーは参照によってどこでも実行できます。各プラットフォームでスキーマを再作成する必要はありません。
| 分野 | ソース | 目的 |
|---|---|---|
AnalyzerId | ステップ2で入力した文字列 | AIパーサーがスキーマを特定するために使用する安定した識別子。 |
docName | ソース PDF ファイル名 | 追跡情報やエラーメッセージの表示に使用されます。 |
docContent | ソース PDF エンコードされた Base64 | 抽出元の文書。 |
async | false 同期の場合、 true 世論調査のために | 応答配信を制御します。 |
例 REST リクエストボディ:
{
  "docName": "purchase_order.pdf",
  "docContent": "BASE64_ENCODED_PDF_CONTENT",
  "AnalyzerId": "purchase_order_parser",
  "async": false
}
レスポンスには、定義した項目ごとに 1 つのフィールドが含まれます。 fields. ルート JSON 下流のシステムに: Google Sheets、 Airtableデータベース、 Excelまたは、ウェブフック。
一般的なワークフロー
典型的なAIパーサーのパターンHow a saved Analyzer moves from dashboard to production.
- 新しい発注書 PDF 監視対象のメールボックスまたはアップロードフォルダに届きます。
- Make、 Zapier、 Power Automate、 または n8n AIパーサーを呼び出す
AnalyzerId: purchase_order_parser。 - 返された JSON (
販売注文番号、エージェント名、注文日、合計金額) はあなたの ERP 注文作成 API。 - 解析された注文番号を使用して、確認メールが顧客に送信されます。
- 請求書 PDF ウェブフック、監視フォルダ、または共有受信トレイ経由で届きます。
- AIパーサーは次のように呼び出されます
AnalyzerId: invoice_parser(請求書クイック入力スキーマ) - 構造化された応答(
請求書番号、合計金額、期日) は行として追加されます Google Sheets または Excel 経理チーム向け。
- 監視対象のフォルダには、請求書、発注書、出荷伝票など、さまざまな種類の文書が混在して保存されます。
- 分類アナライザーは、各ファイルを適切なカテゴリラベルに振り分けます。
- ラベルに基づいて、ワークフローは一致する Parse Analyzer を呼び出します (
請求書パーサー、購入注文解析器、配送メモ解析器構造化された出力を適切な宛先に書き込みます。
スキーマのベストプラクティス
- 記述的
fieldDescription文字列。実際の文書で見かける別の名称(「販売注文番号。SO No.、注文参照、またはPO参照とも表記される」)を記載してください。 - 選ぶ
fieldType気をつけて。dateそしてnumberエンジンに解析のヒントを与える。string形状が予測できない場合の代替手段です。 - 保つ
fieldName機械可読形式(キャメルケースまたはパスカルケース、スペースなし)。 JSON 応答のキー。 - 請求書または発注書のクイック入力機能から始めて、必要に応じて項目を削除したり追加したりしてください。プリセットは良いベースラインとなります。
- アナライザーに本番環境のトラフィックを投入する前に、オプションフィールドの欠落、2ページ目の文書、OCRで生成されたテキストなどのエッジケースを含め、3つの実際のサンプルでテストを行ってください。
- 破壊的なスキーマ変更を行う際のバージョンアナライザーID(
invoice_parser_v1、invoice_parser_v2)そのため、ライブオートメーションは独自のペースで移行できます。