Compress PDF
The Compress PDF action reduces the file size of a PDF by applying a compression profile you select. It takes one PDF document as input and returns a single compressed PDF with the same pages, its images and internal structure optimized according to the profile.
Use it to shrink large scanned documents before they are emailed, since many mail servers reject attachments over a fixed size. Use it to cut the storage cost of PDF files that a workflow saves to cloud storage in bulk. Use it to prepare PDF files for quick display in a browser, where the Web profile makes the first page appear fast.
Configuration
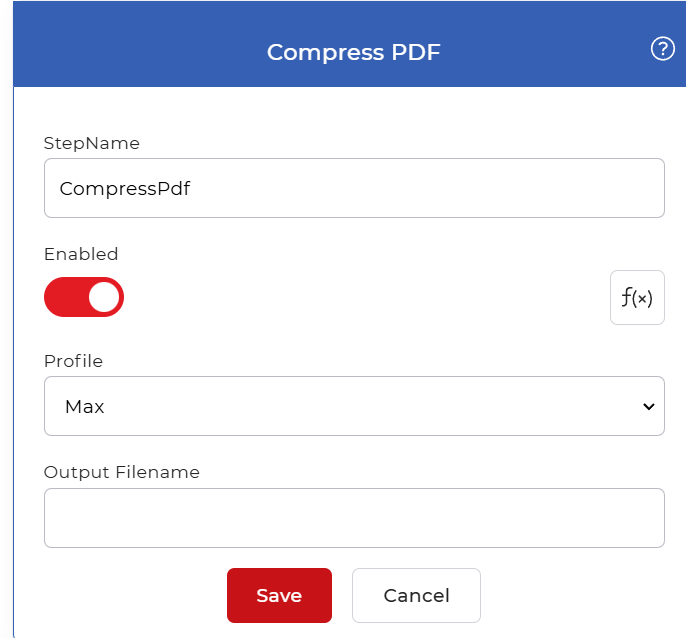
Configure the Compress PDF step in the workflow builder:
Action overview
| Input | Single PDF document |
| Output | A single compressed PDF document |
Properties
Profile
- Type: Select
- Required: Yes
Sets how far the file is compressed and what the result is optimized for. Choose one of four values:
- Default: minimal compression with the least quality loss. Start here when you want a smaller file but cannot risk a visible change.
- Max: maximum compression for the smallest size, shortest download, and fastest display. It compresses images and can drop some image detail, so use it when size matters more than image fidelity.
- Web: optimized for viewing in a browser. It linearizes the file so the first page shows quickly and does not compress images much, which suits documents published online.
- Print: keeps the correct fonts, color scheme, and a resolution suitable for printing, with only a minor drop in image dpi. Use it for files headed to a printer.
Change the profile when the destination of the file changes: Max for email attachments, Web for online viewing, Print for print jobs.
Output Filename
- Type: Text
- Required: No
Sets the name of the compressed PDF the action returns. Leave it blank to keep an auto-generated name derived from the input file, and set it (for example invoice-compressed.pdf) when a later step such as Save to Google Drive needs a predictable filename.
How to compress PDF using Workflows
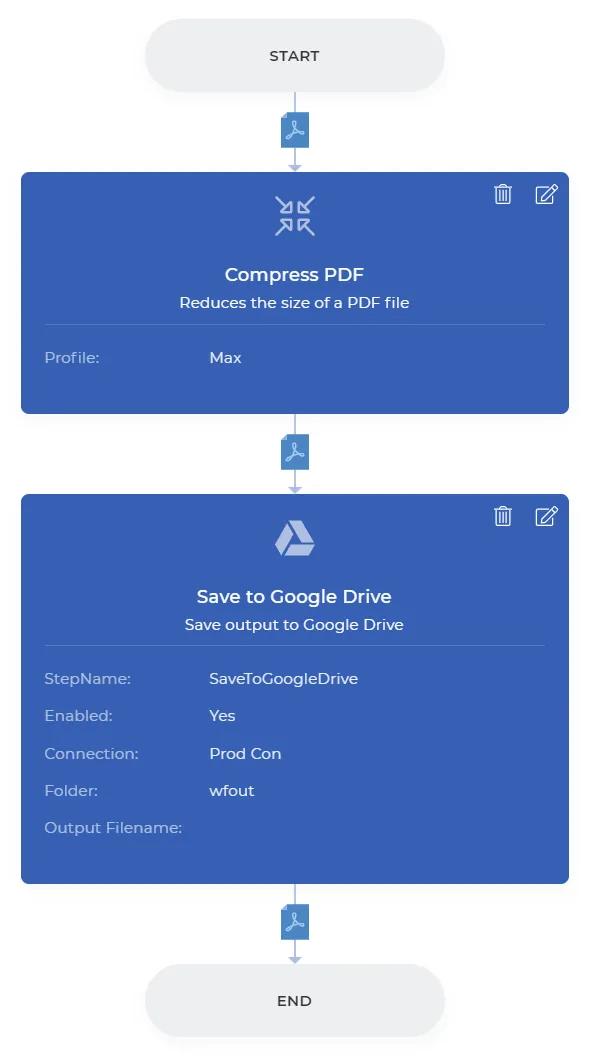
PDF4me Workflows can compress PDF files automatically as they arrive. Here is a sample workflow that compresses PDF files and saves them to your storage.
Create a workflow
Go to the Workflows dashboard and select the Create Workflow button to start building your automation.

Add a trigger
Create and configure a trigger to initiate the workflow. For this example, use a Google Drive trigger. PDF4me Workflows also support Dropbox triggers, so choose whichever suits your workflow.

Add the Compress PDF action
Add and configure the Compress PDF action, then choose the compression profile that fits your needs:
- Default: normal compression with the least quality loss.
- Max: high compression with some quality loss.
- Web: linearized PDF for fast web view.
- Print: optimized for print jobs.

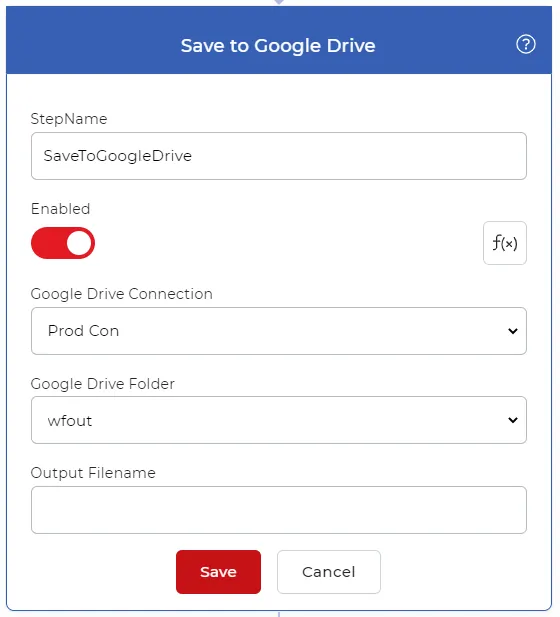
Add a Save to Storage action
Once the files are compressed, save them to your storage. For this use case, add and configure a Save to Google Drive action.
Save and publish
Select Save and Publish once the workflow is configured. The completed sample workflow looks like this.
Try it in PDF4me Workflows
Open the Workflows dashboard, create a workflow, and add the Compress PDF step to run this on your own documents.