Add Barcode
Draw a barcode or QR code onto a PDF and get the same document back with the code stamped on it. You supply a single PDF, set the text the code carries, the format, and where it sits on the page, and the step returns one PDF with the barcode added to each page you named.
Use it to print a tracking or order number as a scannable Code128 barcode on shipping labels and invoices, to add a QR code that links to an online copy or a verification page, or to encode an invoice ID as a Datamatrix so a warehouse scanner can pull up the record from the printed page.
Configuration
Configure the Add Barcode step in the workflow builder:
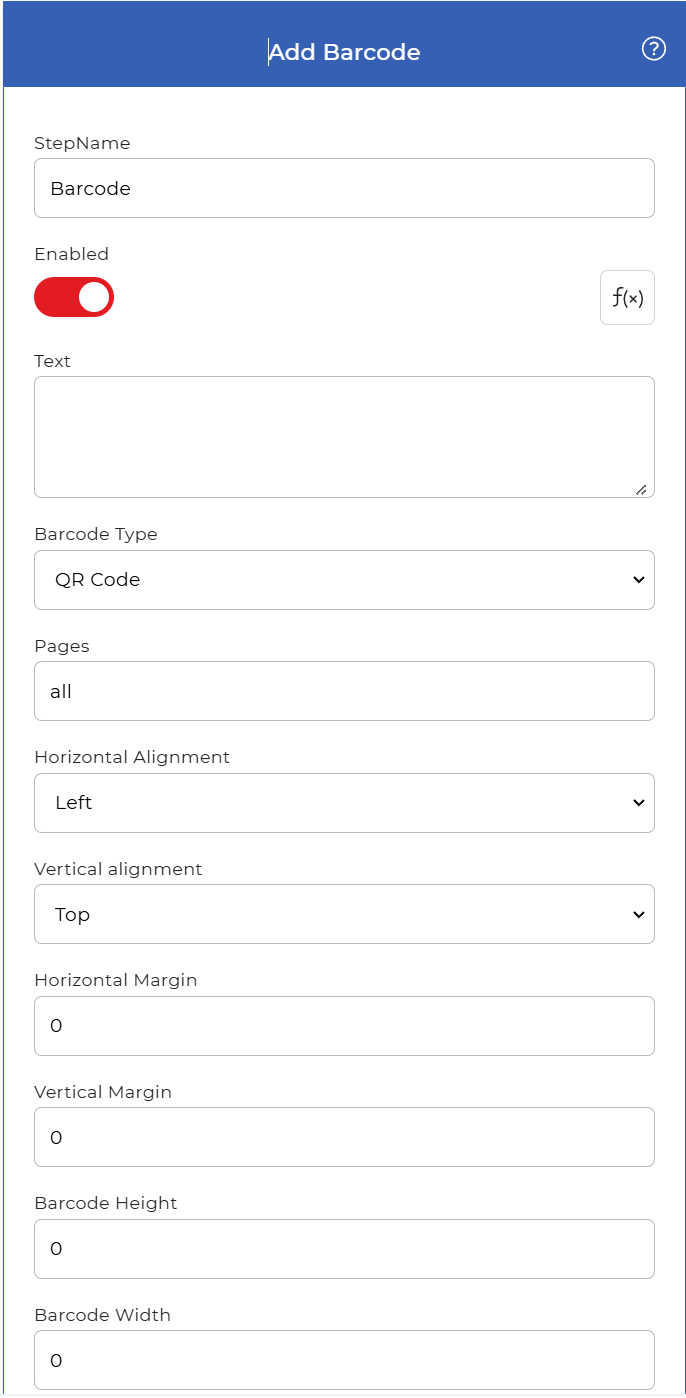
Action overview
| Input | Single PDF document |
| Output | The same PDF with the barcode added to the chosen pages |
Properties
Text
- Type: String
- Required: Yes
The value encoded in the barcode, such as a URL, an order number, or an invoice ID. The length you can fit depends on the barcode type you chose, since a shorter string keeps a 1D barcode readable.
Barcode Type
- Type: Select
- Required: Yes
The kind of code to draw. The supported formats are:
- QR code: a square 2D code that holds URLs or longer text and scans from most phone cameras.
- Datamatrix: a compact 2D code that packs data into a small footprint, common on small parts and labels.
- Code128: a linear 1D barcode for numbers and letters, common for tracking and inventory numbers.
Pages
- Type: String
- Required: Yes
The pages that get the barcode. Enter page numbers (1, 2, 3) or a keyword (first, last, all). Only the pages you name receive the code.
Horizontal Alignment
- Type: Select
- Required: Yes
Where the barcode sits across the width of the page. The allowed values are:
- Left: against the left edge of the page.
- Center: an equal distance from the left and right edges.
- Right: against the right edge of the page.
Vertical alignment
- Type: Select
- Required: Yes
Where the barcode sits down the height of the page. The allowed values are:
- Top: against the top edge of the page.
- Middle: an equal distance from the top and bottom edges.
- Bottom: against the bottom edge of the page.
Horizontal Margin
- Type: Integer
- Default: 0
A gap in millimeters that pushes the barcode in from the edge it is aligned to. With Left alignment it sets the gap from the left edge, with Right alignment the gap from the right edge. With Center alignment this field is ignored.
Vertical Margin
- Type: Integer
- Default: 0
A gap in millimeters that pushes the barcode in from the top or bottom edge. With Top alignment it sets the gap from the top edge, with Bottom alignment the gap from the bottom edge. With Middle alignment this field is ignored.
Barcode Height
- Type: Integer
The barcode height in millimeters. Set 0 to use the default height, or a height sized from the aspect ratio.
Barcode Width
- Type: Integer
The barcode width in millimeters. Set 0 to use the default width, or a width sized from the aspect ratio. Raise it when a scanner needs a larger target.
Barcode Color
- Type: String
- Default: #000000ff
The color of the barcode symbols, written in hexadecimal as #RRGGBBAA:
- RR: the red channel.
- GG: the green channel.
- BB: the blue channel.
- AA: opacity, from 00 for fully transparent to FF for fully opaque.
For example, blue is #0000FFFF, red is #FF0000FF, and yellow is #FFFF00FF. Keep a dark code on a light background so scanners read it reliably.
Background Color
- Type: String
- Default: #ffffffff
The color of the area behind the barcode, written in the same #RRGGBBAA form as the barcode color. The default white gives most scanners the contrast they need.
Hide Text
- Type: Boolean
- Required: Yes
Hides the human-readable text printed beside the barcode. This applies to the Code128 type. Turn it on when you want the bars alone with no caption.
Opacity
- Type: Integer
- Required: Yes
How solid the whole barcode looks, from 0 for fully transparent to 100 for fully opaque. Lower it when the code should sit lightly over existing page content.
How to use in a workflow
Place Add Barcode after the step that supplies the PDF, which is either a trigger that picks up a new document or an earlier action that produced one, such as a generated invoice or a merged file. The step returns one PDF with the code drawn on the pages you named, so send that output to a save step such as Save to Dropbox, an email step that attaches it, or a later PDF action that keeps building the document.
Try it in PDF4me Workflows
Open the Workflows dashboard, create a workflow, and add the Add Barcode step to run this on your own documents.